Toon-Outline Style
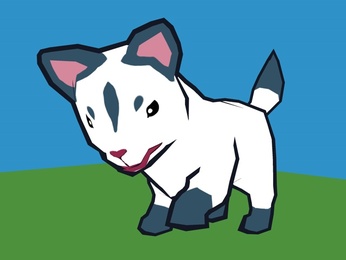
The toon-outline style is found mostly in games nowadays. It was notably well done in the Okami series by capcom. Here, we will try the same trick to create the same toon-outline technique that (I observed and believe) is used in the game Okami and the recent OkamiDen.
Quick Summary of the Technique:
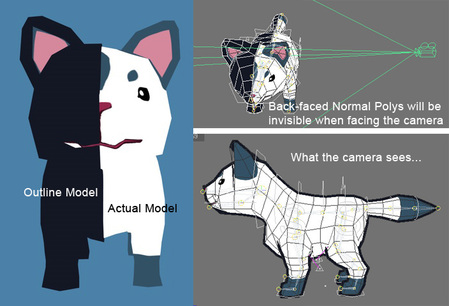
The outline is actually a copy of the original model, normal-scalled (extruded) bigger than the original model, and had the normal reversed. That way, the outline model is only visible behind the original model.
Step-by-Step Explanation:
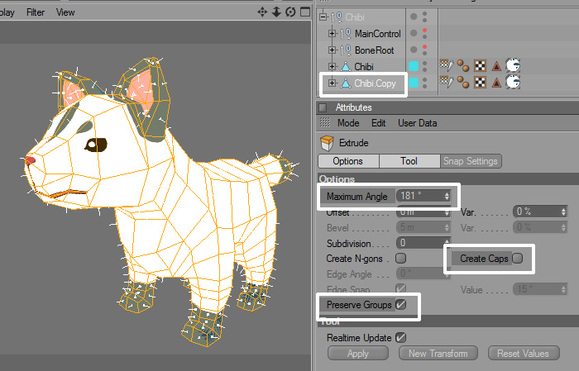
When the model is ready (and rigged if needed), make a copy of the model. Only copy the mesh, don't copy the joints and controllers, as both original model and the outline will be controlled by only one set of joints. Rename the copy model as Outline for easy recognition.
To make the Outline bigger we need to use Extrude, as Scale Tool will not scale based on normal direction (I wish C4D has that feature). Make sure all the Faces are selected, activate the Extrude Tool and take care of the attribute. The most important attribute is the Angle; make sure it is set higher than 180 degrees, otherwise some sharp-angled faces will break apart.
To make the Outline bigger we need to use Extrude, as Scale Tool will not scale based on normal direction (I wish C4D has that feature). Make sure all the Faces are selected, activate the Extrude Tool and take care of the attribute. The most important attribute is the Angle; make sure it is set higher than 180 degrees, otherwise some sharp-angled faces will break apart.
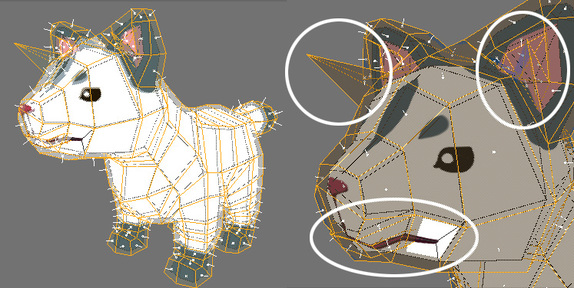
After extrusion, there are some minor tweaking to be handled, especially if the model doesn't have constant quad-poly faces.
We might want to also remove all the faces that is inside of the model, such as inside the mouth and ear areas; we almost never want any outline there.
Also, give a different colour to the outline to differentiate it from the original model.
We might want to also remove all the faces that is inside of the model, such as inside the mouth and ear areas; we almost never want any outline there.
Also, give a different colour to the outline to differentiate it from the original model.
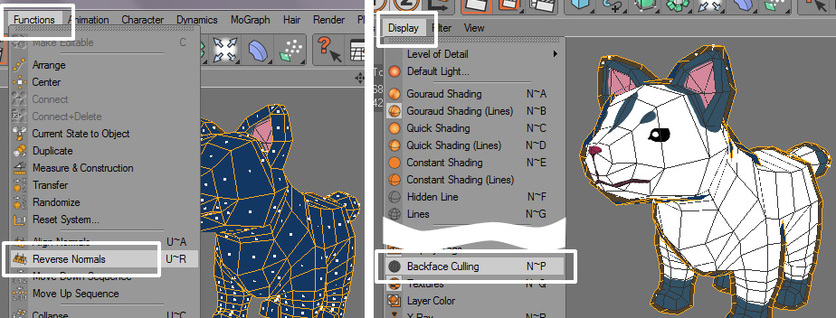
The next step is what makes the magic happen. While all the faces of the outline model are still selected, go to menu Function > Reverse Normals. And to preview it, activate the backface culling by going to viewport menu Display > Backface Culling. Voila!
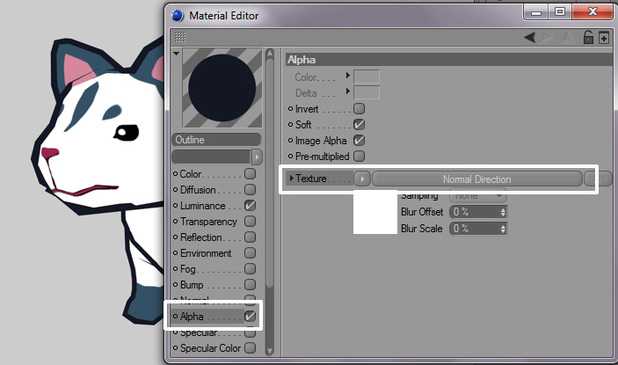
Now, when this model is exported to any game engine, we will see the same effect as we see in here. However, if we want to render it out, we need to include the Normal Direction effect into the Alpha Channel of the outline material.
Conclusion:
This technique is ideal for low-poly game models; not-so-ideal for very hi-poly, as they will be a lot of artifact on the result.
It is a clever technique, as we don't need expensive toon-shading material, and we could have the exact same result on the 3D modelling tool (in this case C4D, but works with any 3D modelling kit too) as the game engine.
Have fun, hope you enjoy it :)
It is a clever technique, as we don't need expensive toon-shading material, and we could have the exact same result on the 3D modelling tool (in this case C4D, but works with any 3D modelling kit too) as the game engine.
Have fun, hope you enjoy it :)
