I finished playing OkamiDen a while ago. It's been exciting! Okami and OkamiDen are more than just game; they are pieces of artwork!
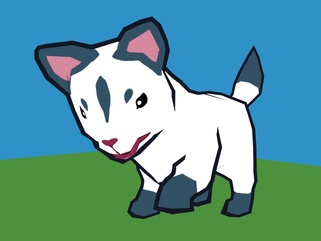
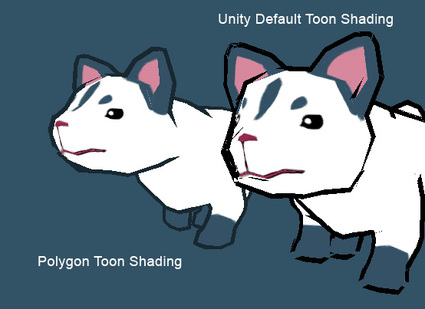
Anyway, while playing it, I observer their distinctive outline style, and realised it's not done by the game engine, and it can be easily done in Cinema 4D.So, I made a test scene with Cinema and Unity game engine. It can be viewed here (requires Unity Web Player. Install it!)I wrote a blog about the technique to share. It is quite lengthy, thus I wrote it in a separate page:HERE!Well, it's been fun doing it. I hope you enjoy it too :)Update:As suggested by my friend YuanQin, a Unity user, here's a direct comparison between the Polygon Outline method vs. Unity Default Toon shading. As we can see from the images below, Unity Toon Shader gives unexpected result and many artifacts in some areas, compared to the Polygon Method.
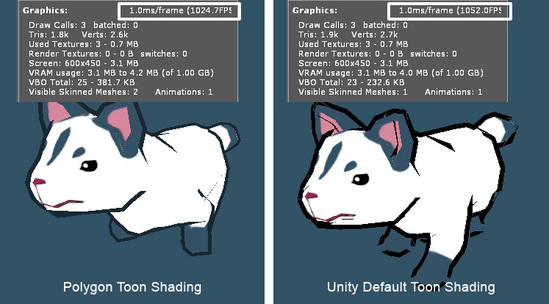
In terms of performance, Unity Toon Shader seems to be giving more stable output. In my machine, it ranges between 900-1100 fps. Meanwhile, the Polygon shading method has larger range of output between 800-1100fps. I haven't tested the method on a bigger environment with more objects.
Well, if anyone happen to use this method, do let me know the result in Unity or any game/VR engine :)
Today, 12 January 2011, Mr. Harald Egel, the CEO and one of the founders of MAXON, came to visit our centre.
I got the chance to meet and take pictures with him.
Such an honour to have the chance.

Me shaking hands with Mr. Harald Egel (leftmost)
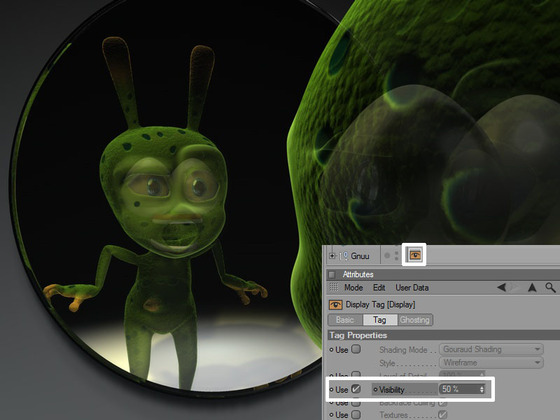
In Cinema 4D, often when we are using Display Tag to make object semi-transparent, the result will look as if the model was being put under XRay scan. The result? It looks strange (I just want to make it transparent, not looking at the organs!) and, in some cases, the rendering time increases riddiculously!
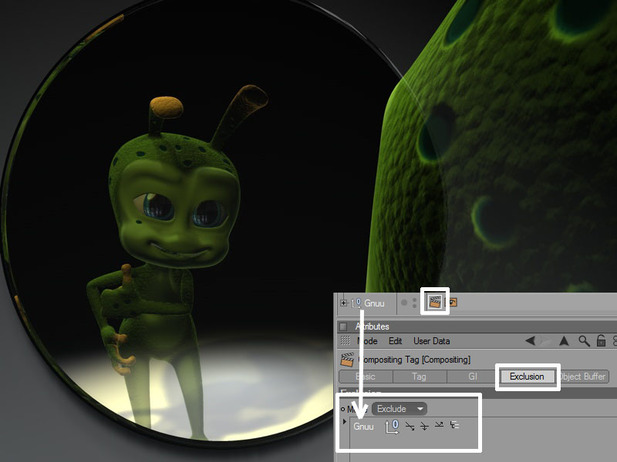
This simple tip will fix that. Add a Compositing tag to the model/group and navigate the Exclusion tab on the attribute.
Drag the model/group itself into the exclusion list and turn on the tranparency and refraction icons next to the name in the exclusion list.
VOILA! fixed :)
I hope this tip is useful. If you like it, do leave some comments for me :)
Thanks to Arno for the tip on the technique!

Recently I was playing around with Hair and Spline Wrap to create leaves on a branch in this image.
So I though I'll share the tips, since it is simple afterall :)Note that the images can be clicked for a larger size to have a clearer look at the parameters.This is done using R11.5, but all versions that support Hair and MoGraph modules should be able to do it.Project files can be downloaded from here if you wish to observe it.
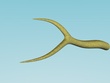
First, we need to prepare the Branch Object.
Create a simple branch using Polygon or Cube, anything that makes a branch.
Use HyperNURBS for smoothing it.
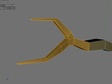
We will then need to select the area where we will grow the leaves on.
Using Live Selection tool to do the selection.
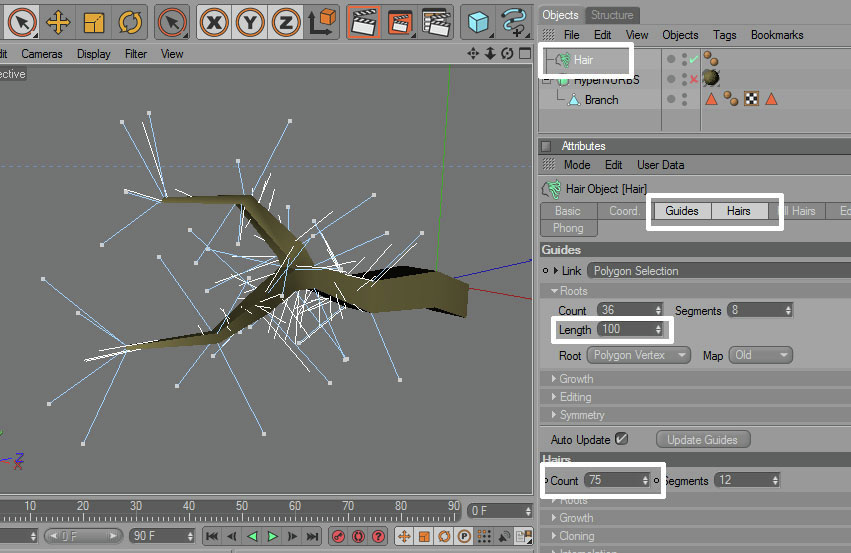
Afterwards, we apply Hair on the selection.
Adjust the length of the guide and the number of hair count, otherwise the leaves will be too many.
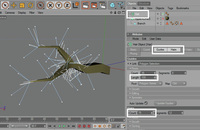
Since we don't need the hair material for this, we can delete it.
We need to turn the generated hair into Spline, it can be used along with Spline Wrap modifier.

Prepare a leaf model by using a Plane and attach a leaf picture with alpha channel.
Turn it to editable and randomise the points slightly to make the shape more organic.
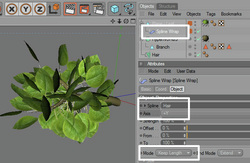
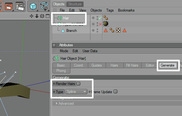
Finaly, add a Spline Wrap modifier, which comes with MoGraph module (in R12, it comes with the Prime version by default).
Make the Splie Wrap a child of the Leaf object.
Drag the Hair object into the Spline parameter.
Turning the Mode to Keep Length will keep the original size of the leaf. Otherwise, keep it at Fit Spline.
Done. :) Set up some lighting and render it. Simple and great result!
Feel free to download the project files from here, if you wish to study it.I hope you enjoy it. And if you do, leave me some comments :)
Recently playing with C4D R12. The new dynamics system is, simply put, AWESOME!!
I was trying on the feature of Soft Body made from Clones.
All I have to do is to set up a ground as a collider, set up a Cloner Object with Grid Array.
Afterwards, attach a Dynamics Body on the Cloner, turn the Collision ellement to All, and finally set the Soft Body to Made of Clones.
Yeah, it is that simple. :)
Another test on the MoGraph Dynamics feature of Cinema.
Although the same effect can be done on previous r11.5, the new r12 gives the capability to have different child clone of the Cloner Object to have a different Dynamics behaviour, because the tag is now can be applied to the Cloner children instead.
Hi everyone.
If you are reading this, thanks for visiting my website.
I will write mostly about my work, and the 'adventure' I had with the software.
CINEMA 4D is my choice for creating 3D artworks.
Well, be back soon!
- Jeff -


 RSS Feed